
TL;DR:
- Choosing bathroom accessibility options requires understanding standards, layout constraints, and future needs for safety and usability.
- Key upgrades include structural blocking for grab bars, installing curbless showers, comfort-height toilets, lever handles, and accessible sinks to enhance functionality and safety.
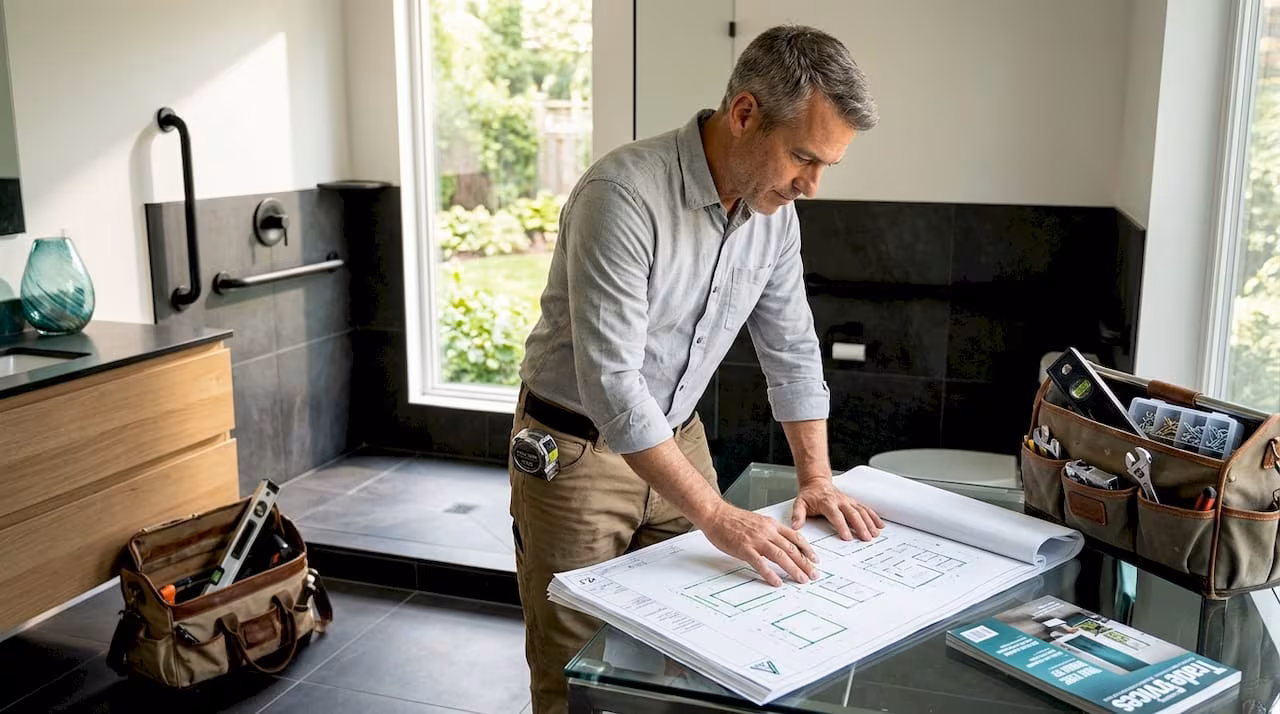
Choosing the right bathroom accessibility options is harder than it looks. Every person’s mobility challenges are different, every bathroom has unique layout constraints, and the gap between “technically compliant” and “actually usable” is wider than most people realize. Universal design, the recognized industry term for spaces built to work for people of all abilities and ages, is the framework professionals use when planning these upgrades. Whether you’re adapting a bathroom for a family member with limited mobility or future-proofing your own home, this guide walks you through the most impactful changes, from simple retrofits to full remodels, so you can make informed decisions without wasting money.
Key Takeaways
| Point | Details |
|---|---|
| Start with grab bars and blocking | Installing structural blocking during a remodel costs far less than retrofitting grab bars into finished walls later. |
| ADA specs are your baseline | Door widths, turning radii, and fixture heights set by the 2010 ADA Standards define the minimum functional threshold for accessibility. |
| Small upgrades deliver real results | Comfort-height toilets, lever faucets, and handheld showerheads improve usability significantly at modest cost. |
| Curbless showers require early planning | Drain placement and floor slope must be coordinated before any floor or tile work begins. |
| Sequence your upgrades strategically | Combine accessibility modifications with routine plumbing or renovation work to reduce overall project costs. |
1. What to know before evaluating bathroom accessibility options
Before picking any fixture or feature, you need a working understanding of the technical standards and spatial realities that govern accessible bathroom design. The 2010 ADA Standards define the foundational requirements: a 60-inch turning circle for wheelchairs, a minimum 32-inch clear door width (with 36 inches strongly recommended for real-world usability), grab bars mounted 33 to 36 inches from the floor, and toilet seat heights between 17 and 19 inches.
Here’s what most homeowners miss: meeting code minimums on individual fixtures doesn’t guarantee a functional bathroom. Even minor deviations in door widths or turning radii can make an otherwise compliant bathroom effectively unusable for wheelchair users.
Key criteria to assess before any project begins:
- Turning space: Is there a clear 60-inch diameter circle anywhere in the bathroom?
- Door width: Can the door be widened to at least 36 inches?
- Structural walls: Are grab bar locations backed by blocking or solid framing?
- Drain and floor level: Can the existing drain support a curbless shower slope?
- Permits: Major modifications, especially drain relocation, require permits and professional contractors.
Pro Tip: If you’re planning any bathroom renovation, have a contractor install structural blocking in the shower and toilet walls now, even if you’re not adding grab bars yet. It costs almost nothing during rough-in and saves hundreds later.
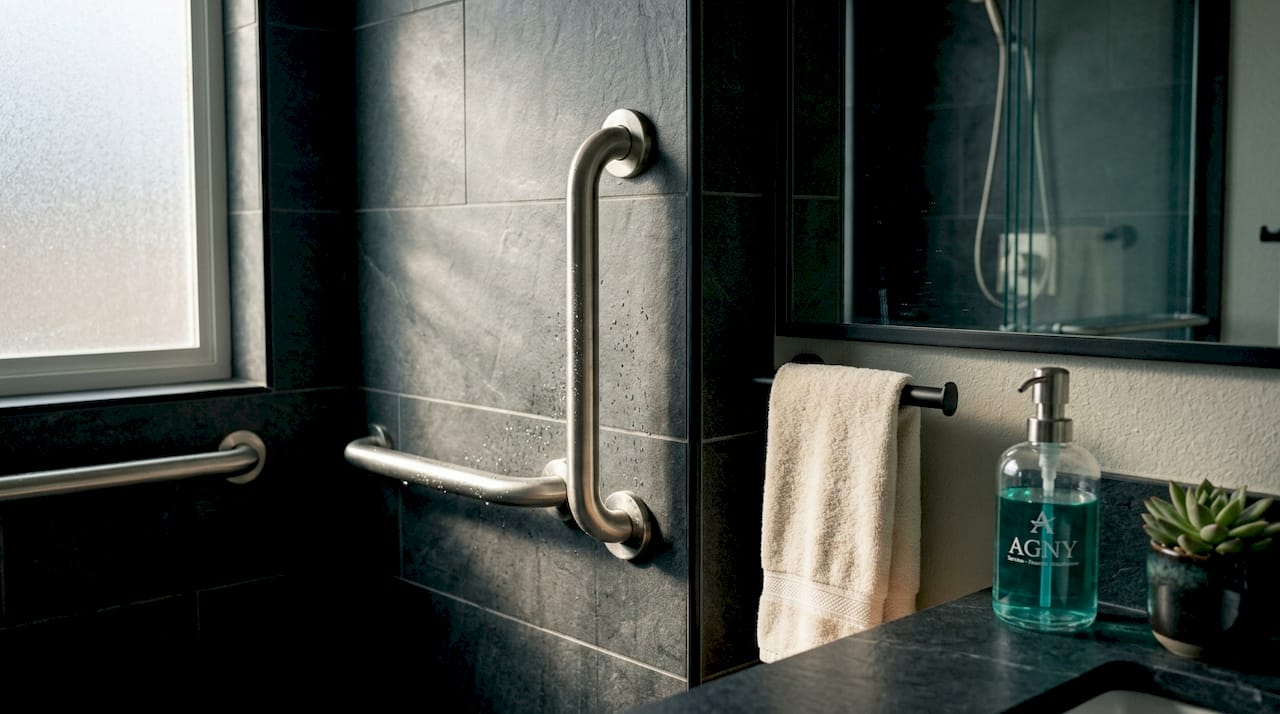
2. Grab bars and wall reinforcement
Grab bars are the single most impactful bathroom safety solution you can install, and the most commonly botched. The ADA requires bars that withstand 250 pounds of force at any point, with diameters between 1¼ and 2 inches, mounted with exactly 1½ inches of clearance from the wall. Rear grab bars in toilet areas must be at least 36 inches long; side bars require 42 inches.
Placement matters as much as the hardware itself. The three locations with the highest safety impact are the shower entry and wall, the area beside the toilet, and the bathtub surround.
What many homeowners don’t budget for is the structural side. Blocking materials run about $50 when installed during a remodel. Retrofitting grab bars into finished tile walls without blocking can cost $400 to $800, and that’s before the bar itself. You’re essentially paying for demolition, patching, waterproofing, and retiling.
Grab bar options have also expanded significantly:
- Brushed nickel, chrome, and matte black finishes that look like standard towel bars
- Angled bars designed specifically for shower entries
- Fold-down bars for space-constrained bathrooms
- Integrated shelf-and-bar combinations for dual-purpose use
Pro Tip: When choosing finishes, match grab bars to your existing towel bars and fixtures. Accessible doesn’t have to look clinical, and design continuity keeps the bathroom feeling intentional rather than retrofitted.
3. Curbless (zero-threshold) showers
A curbless shower, also called a zero-entry or barrier-free shower, eliminates the step-over threshold that creates a trip hazard and blocks wheelchair access. For users with balance issues, lower limb weakness, or mobility aids, this is one of the most life-changing bathroom modifications available.
“Curbless showers offer a major safety upgrade, but they require careful planning and expertise to avoid drainage problems, especially in retrofit scenarios.” — BHG
The drainage requirement is where most retrofit projects hit complications. Floor slopes must run consistently from 1/8-inch to 1/4-inch per foot toward a linear or center drain. That means the drain must sit significantly lower than the surrounding floor, which often requires raising the floor level or cutting into the subfloor. In apartments or homes with concrete slab floors, this becomes a major structural project.
What to plan for in a curbless shower installation:
- Drain type: Linear drains along one wall are easier to slope toward and look cleaner; center drains require a four-directional slope
- Waterproofing: The entire shower area, including the transition to the main floor, needs a continuous waterproof membrane
- Glass enclosure: A partial glass panel or frameless door keeps water in without creating a barrier
- Floor texture: Slip-resistant tile or textured material is non-negotiable on sloped surfaces
For a new build or full bathroom gut renovation, a curbless shower adds moderate cost. For a retrofit in an existing bathroom, budget for subfloor work and be prepared for the project to touch more of the room than you originally planned.
4. Comfort-height toilets and toilet height adjustments
Standard toilet seats sit 14 to 15 inches off the floor. For most people with hip replacements, knee issues, arthritis, or limited core strength, that’s too low. Comfort-height toilets raise the seat to 16 to 18 inches, which aligns roughly with standard chair height and reduces the muscular effort required to sit down and stand back up.
The cost difference is minimal: comfort-height models typically run $50 to $150 more than standard toilets. If you’re already replacing a toilet, there is essentially no reason not to choose comfort height.
For situations where full replacement isn’t possible, raised toilet seat adapters provide 2 to 4 inches of additional height without plumbing work. They’re removable, cost under $50, and work reasonably well as a temporary or renter-friendly solution.
Pro Tip: Pair a comfort-height toilet with a wall-mounted grab bar on the dominant side. The toilet height helps, but it’s the combination of height and a stable gripping point that gives users real confidence when sitting and standing.
5. Lever faucets and operable hardware
Knob faucets require grip strength and wrist rotation that many people with arthritis, nerve damage, or limited dexterity simply don’t have. Lever-style faucets meet ADA operability standards by allowing one-hand operation with no tight grasping or twisting required.
The upgrade cost is negligible. Lever handles typically cost $0 to $50 more than knob-style alternatives, and most are direct swaps on existing plumbing. This is one of the few bathroom modifications that can be done in an afternoon with basic tools.
The same principle applies to door hardware and cabinet pulls. Lever door handles replace round knobs; D-ring or bar-style cabinet pulls replace small, hard-to-grip knobs. These are low-cost, high-impact changes that improve usability for nearly every person in the household, not just those with mobility limitations.
6. Handheld showerheads with adjustable slide bars
A fixed showerhead at ceiling height is functionally useless for a seated user or anyone with limited arm range of motion. Handheld showerheads mounted on adjustable slide bars with hoses at least 59 inches long solve this completely, allowing the user to position the head at any height and direct water precisely where needed.
Installed cost runs $80 to $300 depending on the unit. The slide bar mounts to the shower wall and doubles as a light grab point during bathing. For users who shower in a shower chair or bench, this upgrade is not optional. It’s a core safety feature.
Look for models with pause or flow-control buttons on the handset. This lets a seated user stop the water without reaching for the wall valve, which matters when balance is the limiting factor.
7. Wheelchair accessible sinks and vanity clearance
Most standard vanities have full-cabinet bases that prevent wheelchair users from rolling underneath. Wheelchair accessible sinks require a minimum 27-inch knee clearance height and 30 inches of width beneath the sink, with no base cabinet blocking the space.
Wall-mounted sinks achieve this most cleanly. The plumbing pipes underneath should be insulated to prevent burns on users who cannot feel temperature on their legs. Faucet controls should be positioned at the front of the sink, within reach of a seated user, and lever-style hardware applies here as well.
For homeowners who want storage alongside accessibility, open shelving on the sides of the sink area replaces the under-sink cabinet. Floating shelves or pull-out drawers positioned at reachable heights work well.
8. Comparison of key accessibility upgrades
| Option | Estimated cost | Retrofit complexity | Space requirement | ADA compliant |
|---|---|---|---|---|
| Grab bars with blocking | $50–$200 | Low (during remodel) / High (retrofit) | Minimal | Yes |
| Curbless shower | $3,000–$10,000+ | High | Requires drain planning | Yes (with proper specs) |
| Comfort-height toilet | $200–$600 installed | Low | None additional | Partial |
| Lever faucets | $50–$200 installed | Very low | None | Yes |
| Handheld showerhead | $80–$300 installed | Low | None additional | Yes |
| Wheelchair accessible sink | $500–$2,000 installed | Moderate | Knee clearance needed | Yes |
9. How to choose the right upgrades for your situation
Not every home needs a full ADA-compliant bathroom renovation. The right starting point depends on three factors: the user’s current and likely future mobility level, the existing bathroom layout, and the available budget.
For immediate safety without major construction, follow this sequence:
- Install grab bars in the shower and beside the toilet (add blocking first if walls are open).
- Replace the toilet with a comfort-height model.
- Swap all faucets and door hardware to lever style.
- Add a handheld showerhead with a slide bar.
- Assess whether a curbless shower conversion makes sense based on drain location and subfloor access.
- Evaluate sink clearance if a wheelchair user needs knee-clearance access.
- Plan for door widening if the current entry is under 32 inches.
Full bathroom remodel costs scale significantly with structural changes. Separating the project into phases, starting with hardware and fixtures, then moving to structural work, helps spread costs without sacrificing safety in the meantime.
When full ADA compliance is the goal, typically for a household that includes a wheelchair user or someone with significant mobility limitations, layout coordination becomes the most critical factor. Even minor dimension errors can make an otherwise well-equipped bathroom nonfunctional. Work with a contractor who has direct experience with accessibility projects, not just general remodeling.
What I’ve learned from real accessibility renovation projects
I’ve worked on enough bathroom accessibility projects to say this clearly: the biggest mistakes happen at the planning stage, not during construction. Homeowners frequently call us after a well-meaning but poorly planned renovation, because the grab bars don’t have backing, the curbless shower pools water at the edges, or the new toilet is comfort height but there’s no bar to grab.
The gap between code minimum and real-world usability is real. A bathroom can pass inspection and still be functionally unsafe for the person using it. I’ve seen grab bars installed at the right height but in the wrong position for how the user actually transfers. I’ve seen curbless showers that drain beautifully in testing and flood the bathroom floor within a month.
My honest recommendation: start with the unglamorous work. Install blocking in every wall during your next renovation, whether you need grab bars now or not. Choose comfort-height fixtures as your default. Get lever hardware everywhere. These changes cost almost nothing when done proactively and save real money when done reactively.
The other thing I tell homeowners: choosing the right contractor matters more for accessibility work than almost any other renovation type. The tolerance for error is low. One drain that’s two inches out of position means the whole shower floor has to come up.
— Grzegorz
How Agny can help with your accessibility renovation
If you’re ready to move from planning to action, Agny specializes in exactly this kind of work. From structural blocking and grab bar installation to full curbless shower conversions and wheelchair-accessible vanity setups, the team handles the technical complexity that catches most general contractors off guard.

Agny manages permitting, coordinates plumbing and carpentry, and brings the design knowledge needed to build bathrooms that are both functional and genuinely good-looking. For projects where budget is the barrier, renovation financing options can make a full accessibility remodel feasible without a large upfront payment. Explore bathroom renovation services and request a consultation to get a realistic scope and cost estimate for your specific space.
FAQ
What are the most affordable bathroom accessibility upgrades?
Lever faucets, comfort-height toilets, and handheld showerheads each cost under $300 installed and deliver significant usability improvements without structural work.
Do I need permits for bathroom accessibility modifications?
Simple hardware swaps don’t require permits, but drain relocation and structural changes like curbless shower conversions typically do. Check with your local building department before starting.
What makes a bathroom fully ADA compliant?
ADA compliant bathrooms require a 60-inch turning radius, 36-inch minimum door width, grab bars at 33 to 36 inches, and toilet seats at 17 to 19 inches, among other specifications.
Can renters make accessibility modifications?
Many hardware-level changes, like handheld showerheads, raised toilet seats, and removable grab bars with adhesive mounts, are reversible and renter-friendly. Structural modifications require landlord approval.
How do I future-proof a bathroom during a remodel?
Install structural blocking in shower and toilet walls, choose comfort-height fixtures, and design for at least a 36-inch door opening. These steps cost little during construction and eliminate expensive retrofitting later.


