

TL;DR:
- Proper surface preparation and waterproofing are essential for a durable bathroom tile installation and to prevent long-term leaks.
- Selecting the right tools and materials, planning the layout before starting, and allowing proper curing times contribute to a professional-quality finish.
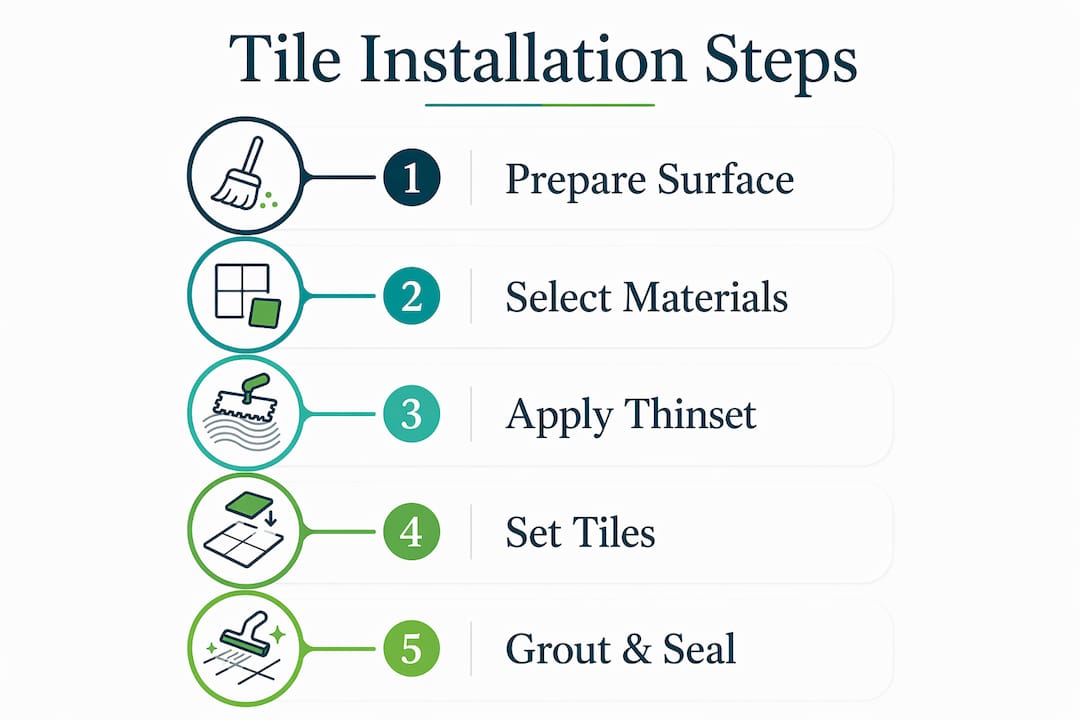
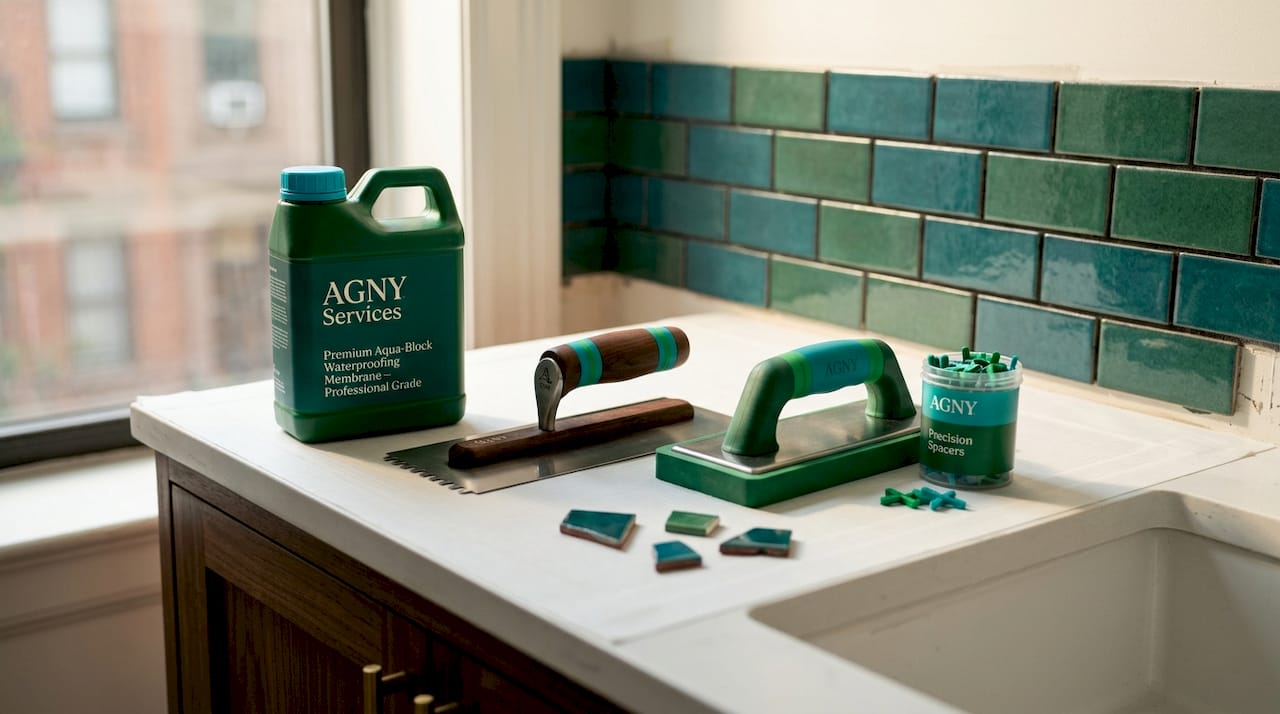
Bathroom tile installation is the process of preparing surfaces, selecting materials, and methodically setting tiles on floors and walls to create a durable, water-resistant, and attractive finish. Done right, a DIY bathroom tile project delivers professional results at a fraction of the contractor cost. You need three core tools before you start: a notched trowel, a tile cutter or wet saw, and a waterproof membrane. This guide walks you through every stage, from tool selection and surface prep to grouting and sealing, so you finish with a bathroom that holds up for decades.
What tools and materials do you need for bathroom tile installation?
Every successful bathroom tile installation guide starts with the right gear. Showing up without a wet saw or rubber mallet is like trying to cook a meal without a knife. The tools below are not optional extras. They are the difference between tiles that stay flat and grout lines that crack in six months.
Essential tools
- Tile cutter or wet saw (a wet saw handles porcelain and large-format tiles cleanly)
- Notched trowel (3/8-inch V-notch for standard tiles; 1/2-inch square-notch for large-format)
- Rubber mallet (for seating tiles without cracking)
- Tile spacers (1/16-inch for rectified tiles; 1/8-inch or larger for standard)
- 4-foot level and chalk line
- Grout float (rubber-faced, for spreading and packing grout)
- Margin trowel (for mixing and spot application)
- Sponges, buckets, and a grout haze remover
Materials checklist
| Material | Purpose | Notes |
|---|---|---|
| Porcelain or ceramic tile | Primary surface covering | Choose slip-resistant for floors (DCOF rating above 0.42) |
| Thinset mortar | Adhesive bond layer | Modified thinset for most bathroom applications |
| Cement backer board | Stable substrate over wood subfloors | 1/2-inch thickness standard |
| Waterproof membrane | Moisture barrier in wet zones | Liquid-applied or sheet membrane |
| Sanded or unsanded grout | Fill joints between tiles | Selection depends on joint width |
| 100% silicone caulk | Movement joints and corners | Never substitute grout here |
For material quantities, order 10 to 15% extra tile for cuts and waste in standard layouts, bumping that figure to 20% for diagonal or intricate patterns. That buffer matters beyond the current job. Ordering extra tile also protects you from future repairs, since matching tile from a different production lot can produce noticeable color and texture differences.
Pro Tip: Select floor tiles with a DCOF (Dynamic Coefficient of Friction) rating above 0.42 for wet bathroom floors. This is the industry standard for slip resistance and it is printed on the tile spec sheet.
How do you prepare bathroom surfaces and the subfloor for tiling?
Surface preparation is where most DIY tile projects succeed or fail. A tile is only as stable as what sits beneath it. Skipping or rushing this stage causes hollow spots, cracked grout, and tiles that pop loose within a year.
Start by checking your subfloor for flex and damage. Bounce lightly on the floor. Any movement means the subfloor needs reinforcement before you lay a single tile. For wood subfloors, install cement backer board over the existing surface, tape the seams with alkali-resistant mesh tape, and embed the tape in a thin layer of thinset mortar. This creates a dimensionally stable, moisture-resistant base that tile adhesive can grip properly.
Once the substrate is solid, follow these preparation steps in order:
- Clean the surface completely. Remove all dust, grease, soap residue, and old adhesive. Thinset will not bond to a contaminated surface.
- Level the floor or wall. Use a long straightedge or level to find high and low spots. Fill low areas with floor-leveling compound and grind down high spots. The industry tolerance is no more than 3/16 inch variation over a 10-foot span.
- Let everything dry fully. Moisture trapped under tile causes adhesive failure. Allow at least 24 hours after any leveling compound application.
- Apply waterproofing membrane. In wet zones like showers, tub surrounds, and the floor within 12 inches of a drain, waterproofing membrane and primer are critical to preventing moisture damage. Apply two coats of liquid membrane, letting each coat dry fully.
- Seal corners and joints. Use fabric membrane tape embedded in the liquid waterproofing at all inside corners, floor-to-wall transitions, and around any penetrations like pipes or drains.
Pro Tip: Apply a 3-day waterproofing cure before tiling in shower areas. Most liquid membranes are touch-dry in hours, but full cure takes longer. Rushing this step is the single most common cause of long-term bathroom leaks.
What are the key steps for laying bathroom tiles effectively?
With a solid, waterproofed substrate ready, you can move into the tile-setting phase. This is where your bathroom tile layout guide becomes critical. A poor layout plan produces narrow slivers of tile at the most visible edges of the room, and no amount of good grouting fixes that.
Find your reference lines. Measure the room and snap chalk lines at the center of each wall. Use the 3-4-5 rule to verify your lines are square: measure 3 feet along one line, 4 feet along the perpendicular, and confirm the diagonal measures exactly 5 feet. If it does not, adjust until it does.
Dry-lay your tiles. Before applying any adhesive, dry lay tiles from your reference lines outward to preview the layout. This step reveals where cut tiles will land and lets you shift the starting point to avoid awkward narrow cuts at doorways or focal walls.
Mix and apply thinset. Mix thinset to a peanut butter consistency. No lumps, no slump. Apply it to the substrate using the notched trowel held at a 45-degree angle. Apply adhesive in small sections to prevent it from drying before you set tiles. Thinset develops a skin quickly, and a skinned surface bonds poorly.
Back-butter large-format tiles. For tiles larger than 15 x 15 inches, apply a thin skim coat of thinset to the back of each tile in addition to the floor or wall application. This eliminates air pockets and guarantees full contact.
Set tiles and check level constantly. Press each tile firmly into the thinset with a slight twisting motion, then seat it with the rubber mallet. Place spacers at every corner. Check level after every three or four tiles. Do not assume the floor or wall is flat enough to skip this check.
Cut tiles last. Mark cuts with a pencil and use the wet saw for straight cuts and a tile nipper or angle grinder for curves around pipes. Always wear eye protection.
Pro Tip: Never spread more thinset than you can cover with tiles in about 10 minutes. Thinset that skins over before tile contact creates a weak bond that looks fine initially but fails under foot traffic and moisture cycles.
How to grout and seal bathroom tiles for durability
Grouting is the step most DIYers rush, and it shows. Cracked, stained, or uneven grout lines are almost always the result of wrong product selection, poor timing, or inadequate sealing.
Allow at least 24 hours of curing time for thinset before walking on tiles or starting grout application. In cool or humid conditions, extend that to 48 hours. Moving to grout too soon disrupts the bond before it has fully hardened.
Follow these steps for clean, durable results:
Choose the right grout. Sanded grout suits joints 1/8 inch or wider. Unsanded grout is for joints narrower than 1/8 inch. Using sanded grout in a narrow joint causes shrinkage and cracking. Using unsanded grout in a wide joint leaves it weak and prone to crumbling.
Mix grout to a smooth, lump-free consistency. Let it slake (rest) for 10 minutes after initial mixing, then remix briefly before use.
Apply with a rubber grout float. Hold the float at a 45-degree angle and work diagonally across the joints. Pack grout firmly into each joint, leaving no voids.
Clean excess grout promptly. Wait 15 to 20 minutes after application, then wipe the surface with a damp sponge in circular motions. Rinse the sponge frequently. Grout haze left overnight becomes very difficult to remove.
Seal the grout. After the grout cures fully (typically 72 hours), apply a penetrating grout sealer. This prevents staining and moisture absorption.
Pro Tip: Change-of-plane joints where walls meet the tub, floor meets wall, or tiles meet a niche must never be grouted. Fill these with 100% silicone caulk in a matching color. Grout in these locations cracks within months because the structure moves slightly with temperature and humidity changes.
Key areas where silicone caulk replaces grout:
- Inside corners in showers and tub surrounds
- Where the tile floor meets the tile wall
- Around the perimeter of a shower niche
- At the base of any wall tile meeting a different material
What common mistakes should DIYers avoid during tile installation?
Even experienced DIYers repeat the same errors. Knowing them in advance saves you from a costly redo.
- Skipping waterproofing. Water management is the single biggest factor in long-term bathroom tile performance. No amount of quality tile compensates for a missing moisture barrier behind the wall.
- Poor layout planning. Starting tiles from a wall instead of the center of the room often produces a row of narrow slivers at the most visible edge. Always dry-lay first.
- Grouting too soon. Thinset must cure fully before grouting. Grouting over uncured adhesive traps moisture and weakens the bond.
- Using the wrong grout in movement joints. Silicone caulk, not grout, belongs in any joint that crosses a change of plane or experiences structural movement.
- Buying exactly the right amount of tile. Running short mid-project and finding the same tile is discontinued is a real and avoidable problem.
Pro Tip: If tiles sound hollow when tapped after the thinset cures, the bond is incomplete. Small hollow spots near edges are sometimes acceptable, but hollow spots in the center of a tile mean it needs to come up and be reset with proper back-buttering.
Key takeaways
A successful bathroom tile installation depends on thorough surface preparation, correct material selection, and disciplined curing times before grouting.
| Point | Details |
|---|---|
| Waterproofing is non-negotiable | Apply membrane and primer in all wet zones before setting a single tile. |
| Order extra tile upfront | Buy 10 to 20% more than your measured area to cover cuts, breakage, and future repairs. |
| Dry-lay before you commit | Planning the layout without adhesive prevents awkward cuts at visible edges. |
| Match grout to joint width | Use sanded grout for joints 1/8 inch or wider; unsanded for narrower joints. |
| Silicone in movement joints | Never grout inside corners or change-of-plane joints. Use 100% silicone caulk instead. |
What I’ve learned from years of bathroom tile work
The most common thing I see on renovation sites is homeowners who spent good money on beautiful tile and then watched it fail because the prep work was treated as a formality. Surface preparation is not the boring part before the real work. It is the real work. Everything else is just placing objects on top of it.
I also think the DIY community underestimates how much layout planning changes the final result. Spending an extra hour dry-laying tiles and adjusting your starting point can be the difference between a bathroom that looks custom and one that looks like someone ran out of tile in the corner. That hour costs nothing.
My honest advice on tools: rent a wet saw if you are only doing one bathroom. Buy quality thinset and grout. Do not cut corners on the waterproofing membrane. The tile itself is often the cheapest part of a failed installation to replace. The labor to tear out and redo everything is not.
For complex wet areas, particularly custom shower builds with multiple planes, niches, or heated floors, I recommend consulting a remodeling contractor before committing to DIY. Some jobs reward patience and careful execution. Others require experience that only comes from doing dozens of them. Knowing the difference is its own skill.
— Grzegorz
Ready to take your bathroom renovation further?
If this guide has you thinking bigger than a tile swap, Agny’s team handles full bathroom renovations in NYC from layout planning through final finish. Whether you want to hand off the tile work entirely or need a professional to handle the waterproofing and substrate while you handle the rest, Agny brings the same attention to prep and detail that this guide describes. Agny also offers guidance on renovation financing options so the project you want does not have to wait for the budget you do not have yet.

For homeowners who want to understand what bathroom renovations add in real value before committing to a full project, Agny’s resources cover both the financial and practical side of the decision.
FAQ
How long does a DIY bathroom tile project take?
A standard bathroom floor takes one to three days for prep and setting, plus 24 to 48 hours of thinset cure time before grouting. Budget a full weekend minimum, and two weekends for a combined floor and wall project.
What is the best tile for bathroom floors?
Porcelain tile with a DCOF rating above 0.42 is the industry standard for wet bathroom floors. It resists moisture absorption, handles foot traffic, and is available in sizes from mosaic to large-format slabs.
How much extra tile should I order?
Order 10 to 15% extra for standard layouts and 20% for diagonal or complex patterns. This covers cuts, breakage, and future repairs where a matching tile from a different production lot may not be available.
Can I tile over existing bathroom tiles?
You can tile over existing tiles if they are fully bonded, flat, and structurally sound. The added height affects door clearances and fixtures, and any loose or hollow tiles must be removed and the substrate repaired first.
When should I use silicone caulk instead of grout?
Use 100% silicone caulk at all change-of-plane joints: inside corners, where the floor meets the wall, and around tubs, shower pans, and niches. These areas move with the structure, and grout cracks in them within months.


